 31.10.2026
Starting seeds at home doesn't require a greenhouse, an expensive growing system, or an entire room full of gardening equipment. I've grown thousands of seedlings over the years, including during my six years running a small cut-flower market garden, and I've learned that a handful of dependable supplies makes a much bigger difference than a collection of fancy gadgets.
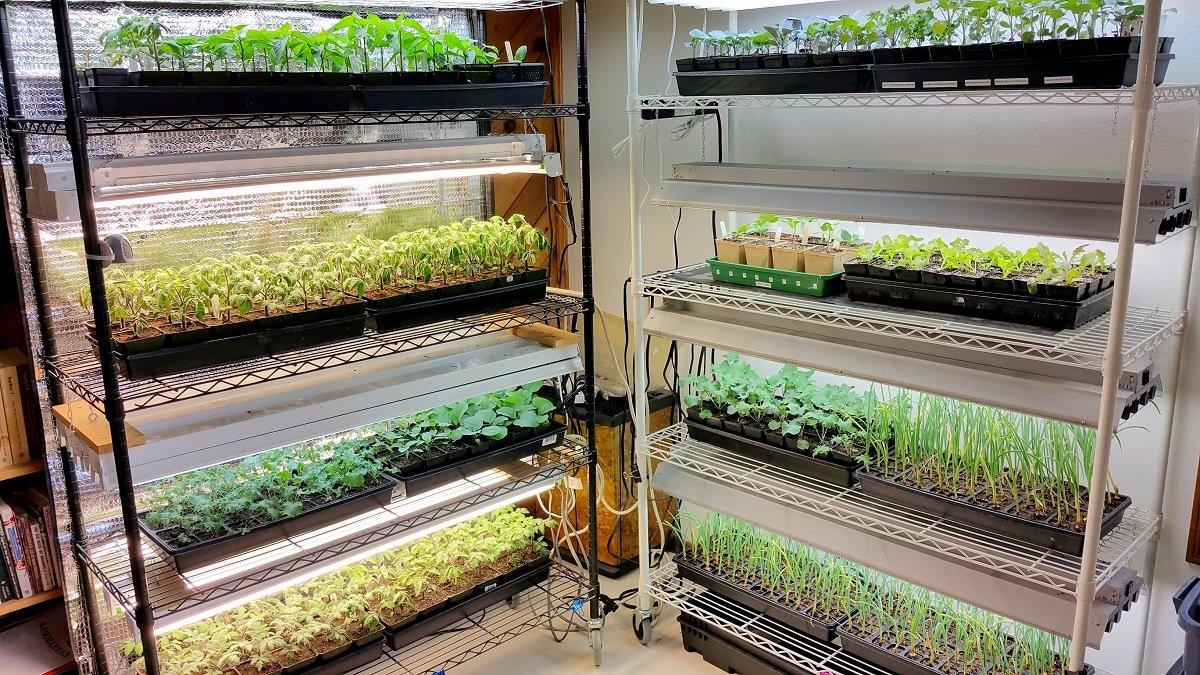
My own seed-starting setup is in the basement of my Boise, Idaho, home, where I grow in USDA zone 7a. We get roughly 11 inches of precipitation annually, have alkaline soil, and deal with late spring frosts that make outdoor planting dates particularly important. I time indoor sowing by counting backward from my local last frost date, rather than following a generic calendar. I recommend checking your own frost dates and local extension service before deciding when to start.
Below, I've put together my 11 essential seed starting supplies, including what each item does, what I look for when buying it, and where I'd save money. You don't need every premium product on the market to grow strong, healthy seedlings.
Seed Starting Trays and Cell Containers
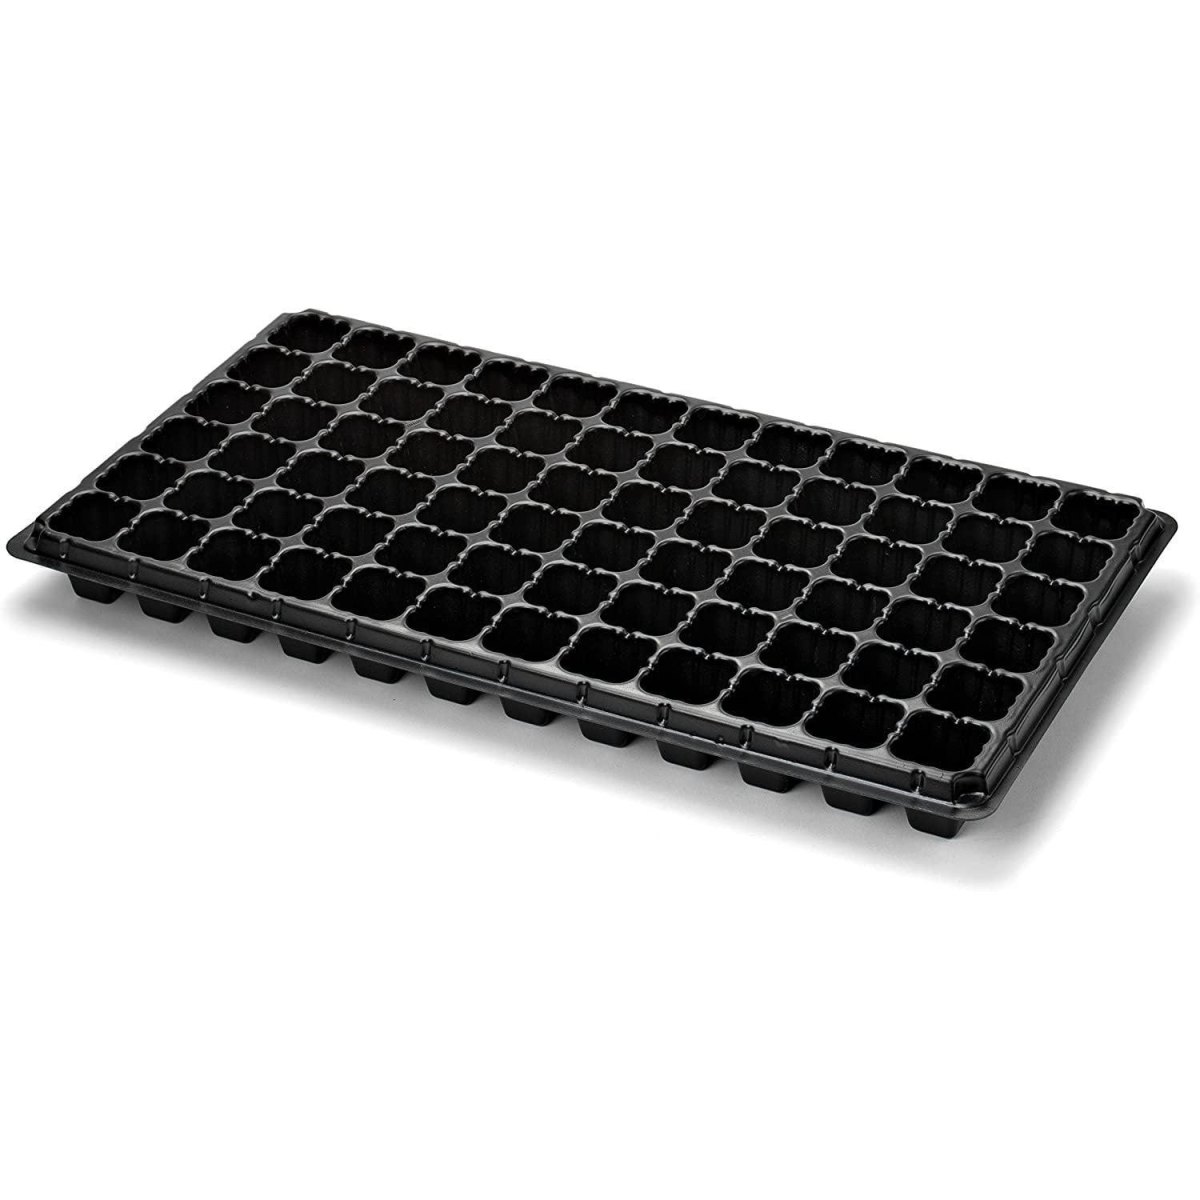
I start with seed trays because they keep the whole operation organized. Individual cells give each seedling its own growing space, making it easier to separate plants and move them when they're ready for transplanting. I particularly like reusable plastic cell inserts because they're inexpensive, easy to store, and can last several seasons when properly cleaned.
Look for containers with adequate drainage holes and enough depth to accommodate developing roots. Standard shallow seed trays work well for many vegetables and flowers, while deeper cells are useful for crops that need more root room. A standard 10-by-20-inch tray is a convenient size for fitting several cell inserts together. Almost any clean container at least 2 inches deep can work if it drains properly. Recycled food containers are perfectly acceptable, too, provided you add drainage holes and clean them before reuse.
My money-saving tip
I wouldn't buy a large collection of different tray sizes when starting out. A few standard trays, matching inserts, and waterproof bottom trays are enough for most home gardens. Wash and disinfect reused containers between seasons to reduce the risk of seedling diseases.
High-Quality Seed Starting Mix
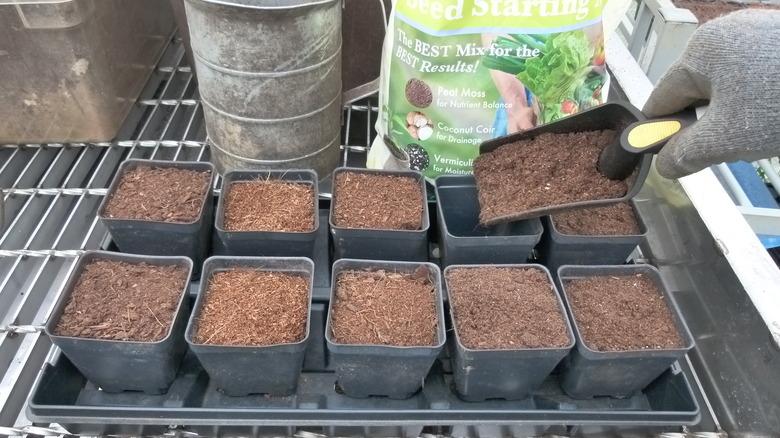
If there's one supply I wouldn't substitute with ordinary garden soil, it's seed starting mix. Garden soil is often too dense for small containers and can introduce weed seeds, insects, and disease-causing organisms. Young roots need a growing medium that holds moisture while allowing air and excess water to move through it.
I look for a fine-textured, lightweight soilless mix made with ingredients such as coconut coir or peat moss, perlite, and vermiculite. These materials help balance moisture retention and drainage. A dedicated seed-starting mix is particularly useful for tiny seeds because its fine texture provides good contact between seeds and the growing medium. It generally contains little or no fertilizer, which is appropriate during germination because seeds carry their own initial food reserves.
Before filling my trays, I moisten the mix evenly with warm water. Some soilless mixes are surprisingly difficult to rehydrate once they become completely dry, so I don't skip this step. The goal is a medium that feels like a wrung-out sponge, not a soggy puddle.
One mistake I avoid
Don't scoop soil directly from a raised bed or garden into your seed trays. Even good garden soil can become compacted in small containers and create unnecessary problems for delicate seedlings.
Vegetable, Herb, and Flower Seeds
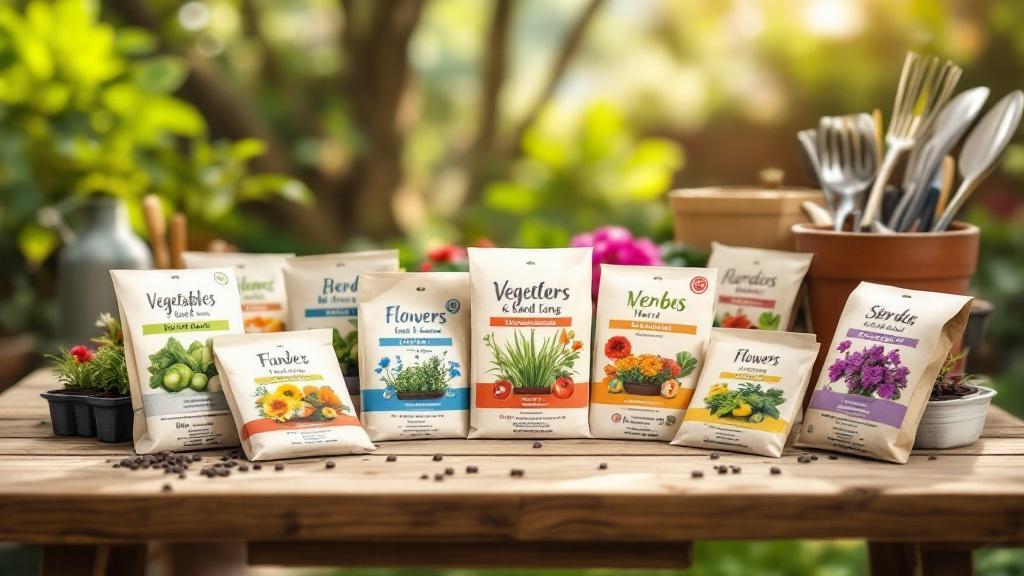
Of course, no seed-starting setup is complete without seeds. This is where I encourage beginners to spend a little time choosing varieties rather than ordering every attractive packet in a catalogue. During my seven years working for a regional seed company, including time in the trial garden, I learned that beautiful catalogue descriptions don't automatically translate into good performance in every garden.
I recommend starting with vegetables your household actually eats, a few useful herbs, and flowers you enjoy seeing around the garden. Tomatoes, peppers, lettuce, basil, zinnias, and marigolds are useful examples, although each has different germination and growing requirements. Read the packet for sowing depth, germination temperature, expected days to maturity, and whether the variety is suitable for your growing conditions.
I also pay attention to the germination percentage and testing date printed on seed packets. Iowa State Extension considers germination rates of 90% or higher very good for most species, although some naturally have lower rates. Older seeds aren't automatically useless, but I would test questionable leftovers before dedicating an entire tray to them.
- Vegetables: Tomatoes, peppers, lettuce, broccoli, and cabbage.
- Herbs: Basil, parsley, thyme, and oregano.
- Flowers: Zinnias, cosmos, marigolds, and calendula.
In my Boise zone 7a garden, I calculate indoor sowing dates from my expected last spring frost and the variety's recommended lead time. Our high-desert climate, limited rainfall, alkaline soil, and occasional late frosts are not universal conditions. Use your own frost information and local extension recommendations rather than copying my timing.
Seedling Heat Mats
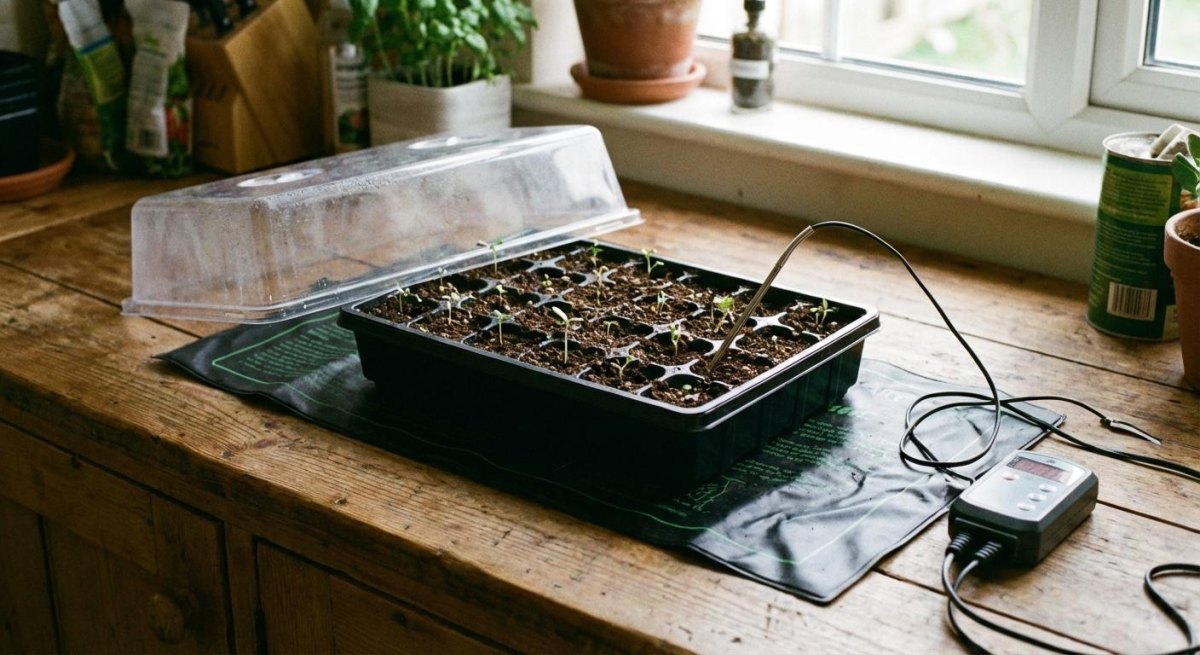
Some seeds germinate much more reliably when their growing medium stays warm. That's where a seedling heat mat can be useful. I particularly consider one for warm-season crops such as tomatoes, peppers, and eggplants when my basement growing area is cooler than their preferred germination conditions.
A thermostatically controlled heat mat is my preferred option because it helps maintain a more consistent growing-medium temperature. I don't assume every seed needs bottom heat, though. Cool-season crops have different requirements, and a heat mat that is useful for peppers may be unnecessary for lettuce or cabbage.
For reference, Illinois Extension notes that many seeds germinate best when the medium is around 70–75°F, but the appropriate temperature depends on the crop. I always check the seed packet instead of setting every tray to the same temperature.
When to switch it off
Once seedlings have emerged, reassess the need for bottom heat. Many crops no longer need it after germination. University of Maine Extension recommends removing trays from bottom heat when approximately half the seeds have sprouted, allowing the mat to be reused for another batch.
Grow Lights and Adjustable Light Fixtures
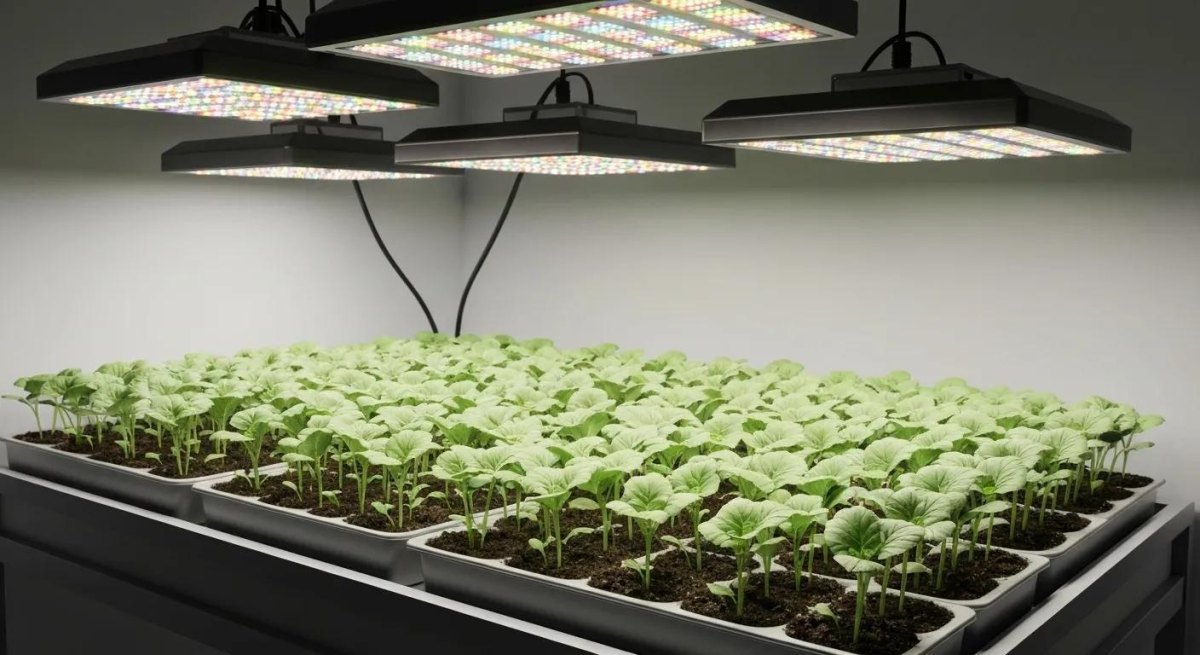
If I could choose only one piece of equipment to improve the quality of indoor seedlings, I'd put proper lighting near the top of the list. A bright-looking windowsill doesn't necessarily provide enough light for compact, sturdy growth. I've seen plenty of seedlings stretch toward a window and develop thin stems because they simply weren't receiving enough light.
I use adjustable LED or fluorescent shop lights rather than assuming I need the most expensive grow-light system available. Utah State University Extension explains that ordinary shop lights can provide suitable supplemental lighting for seedlings. It recommends a photoperiod of approximately 12–14 hours daily in its materials guide, while other extension guidance commonly recommends around 12–16 hours depending on the crop and lighting setup.
I also like adjustable fixtures because seedlings grow quickly, and the distance between the light and the leaves needs to be monitored. The correct distance depends on the light's intensity and manufacturer recommendations. I keep lights close enough to prevent stretching without allowing leaves to become overheated.
Don't rely on a sunny window alone
Natural sunlight is welcome, but it often isn't enough for seedlings started early indoors. If your plants become tall, pale, and floppy, check lighting first rather than immediately adding fertilizer.
Watering Can and Spray Bottle
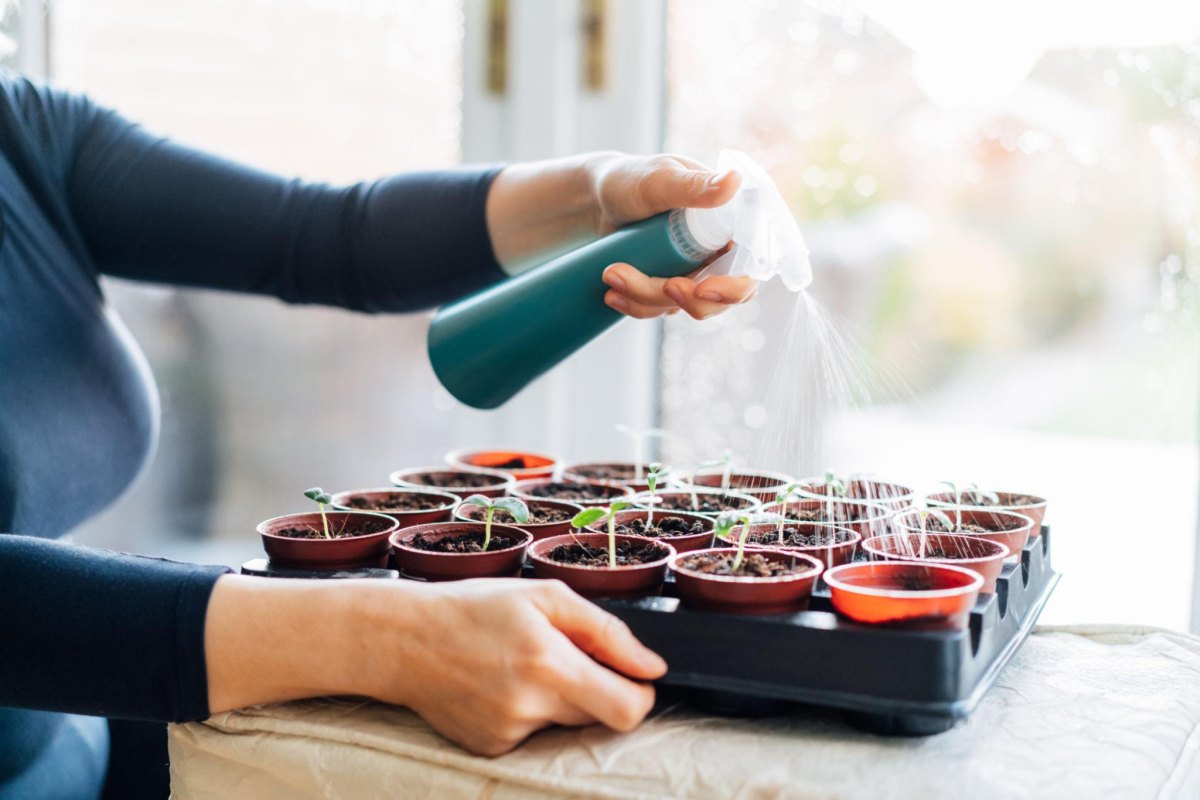
Watering looks simple until you accidentally wash tiny seeds out of their cells or keep the growing medium permanently saturated. I've learned that gentle, controlled watering is much more useful than watering frequently without checking the soil.
I keep a small watering can with a narrow spout for established seedlings and a spray bottle for carefully moistening the surface when needed. A spray bottle is particularly useful immediately after sowing tiny seeds, although I don't depend on misting alone to keep the entire root zone hydrated.
My preferred technique for many seed trays is bottom watering. I add water to the outer tray and allow the growing medium to absorb it through the drainage holes. Utah State University Extension identifies both spraying and bottom watering as practical options, while University of Maine Extension also demonstrates bottom watering for delicate seedlings.
- Check. Feel the growing medium before adding water.
- Add. Pour a shallow amount of water into the bottom tray.
- Wait. Allow the cells to absorb moisture through their drainage holes.
- Drain. Remove excess water rather than leaving containers sitting in it indefinitely.
In my Boise basement, I pay particular attention to airflow and moisture because our dry outdoor climate doesn't mean indoor seedlings should be constantly wet. Excess moisture and poor air circulation can contribute to damping-off problems. I aim for evenly moist media, not waterlogged roots.
Humidity Domes and Seed Tray Covers
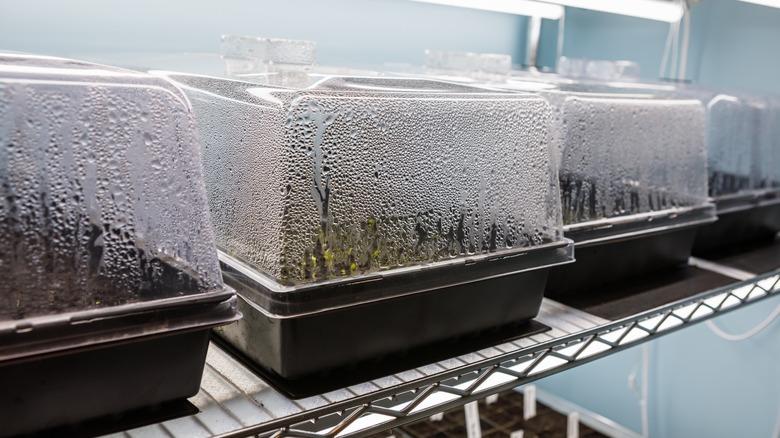
Humidity domes are clear plastic covers that sit over seed trays and help retain moisture while seeds germinate. They're especially useful in dry indoor environments, where the surface of a shallow seed tray can dry out surprisingly quickly.
I consider clear, removable humidity covers a helpful addition rather than an essential purchase. A reusable dome with adjustable vents is convenient, but a suitable clear cover can serve the same general purpose. The important part is being able to remove it easily once seedlings emerge.
Here's the detail I don't want beginners to miss. Humidity domes are mainly for germination, not for keeping growing seedlings enclosed indefinitely. University of Maine Extension advises removing the cover after germination, and the University of Kentucky's recent seed-starting guidance also recommends removing domes once seeds have emerged.
Don't leave seedlings sealed under plastic
Once seedlings emerge, they need light and air circulation. Leaving covers on too long can keep the growing medium excessively wet and increase the risk of seedling disease. Open vents as seedlings emerge and remove the cover as appropriate for the tray.
Plant Labels and Waterproof Markers
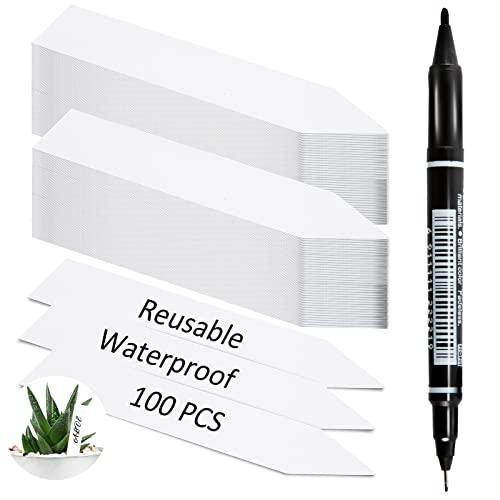
Plant labels are one of the cheapest items in my seed-starting setup, and I would never leave them off my supply list. When several varieties are growing together, it is remarkably easy to forget which cell contains which seed. Two weeks later, a tray full of similar-looking seedlings isn't particularly helpful if you can't identify them.
I use reusable plastic plant labels and waterproof markers to identify the crop and variety. I also like recording the sowing date, especially when I am comparing varieties or trying to work out why one batch germinated faster than another.
My recommendation is to label each variety immediately after sowing. Don't wait until the seedlings emerge. Mississippi State University Extension also emphasizes the value of tagging seed containers to avoid confusion as plants develop.
- Write the crop name clearly.
- Include the specific variety.
- Record the sowing date.
- Use a waterproof marker that won't disappear after watering.
- Keep a simple notebook or spreadsheet for germination observations.
I've found that a few minutes of labeling now saves a surprising amount of guesswork later. It's also much easier to compare germination results when every tray has accurate records.
Seed Starting Soil Tools and Scoops
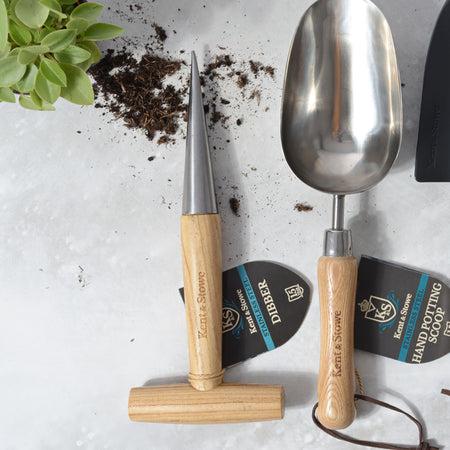
I don't use a complicated collection of tools for filling seed trays. A small scoop, a clean dibber, a pencil, and a teaspoon can handle most of the work. The important thing is having tools that let me fill cells neatly without compacting the growing medium.
A small soil scoop makes filling individual cells easier, particularly when working with a fine seed-starting mix. A dibber or planting tool helps create consistent sowing holes, while a pencil or wooden stick can be used to gently position seeds and separate small seedlings.
When transplanting, I prefer a narrow, clean tool that can lift the root area without pulling on delicate stems. University of Missouri Extension recommends using a clean knife, spatula, or similar implement when separating seedlings. It also advises handling seedlings by their leaves rather than their fragile stems.
- Soil scoop: Fills cells without making a mess.
- Dibber: Makes small planting holes.
- Pencil or wooden stick: Helps position seeds and loosen growing media.
- Small spatula: Helps lift seedlings during transplanting.
I'd buy these gradually rather than purchasing an expensive seed-starting tool kit. Most beginners already own a pencil and a small spoon, and those two items can do a surprising amount of work.
Thermometer and Soil Moisture Meter
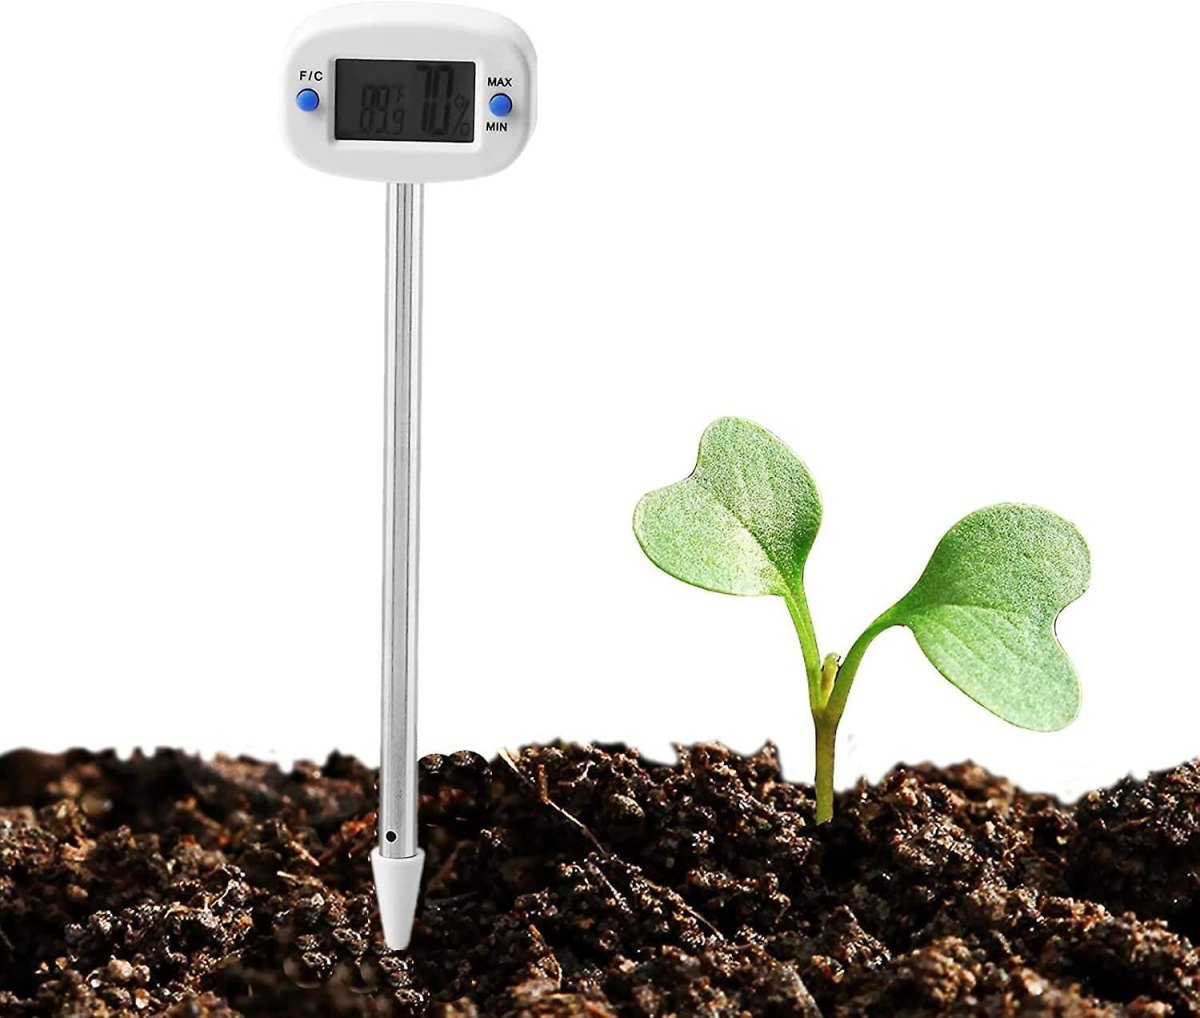
Seeds respond to their growing environment, and two things I like to monitor are temperature and moisture. A room thermometer can tell me whether my growing area is particularly cold, but the temperature of the growing medium is what matters during germination.
A digital thermometer with a probe can help me check the temperature around the seed zone, particularly when using a heat mat. Different crops have different germination requirements, so I use the seed packet as my reference rather than treating one temperature as suitable for everything.
A soil moisture meter is optional. I sometimes find that checking the growing medium with my finger is perfectly adequate for small trays. If you prefer using a meter, choose one that can be used in the type of growing medium you have and treat its reading as a guide rather than an absolute measurement.
| Supply | What I monitor | How useful it is |
|---|---|---|
| Room thermometer | Ambient growing-area temperature | Helpful |
| Temperature probe | Growing-medium temperature | Very useful with heat mats |
| Moisture meter | Growing-medium moisture | Optional |
| Finger check | Surface and media moisture | Free and practical |
In my experience, consistent monitoring beats buying more equipment. A simple thermometer and regular checks can prevent many avoidable seed-starting problems.
Larger Pots for Transplanting Seedlings
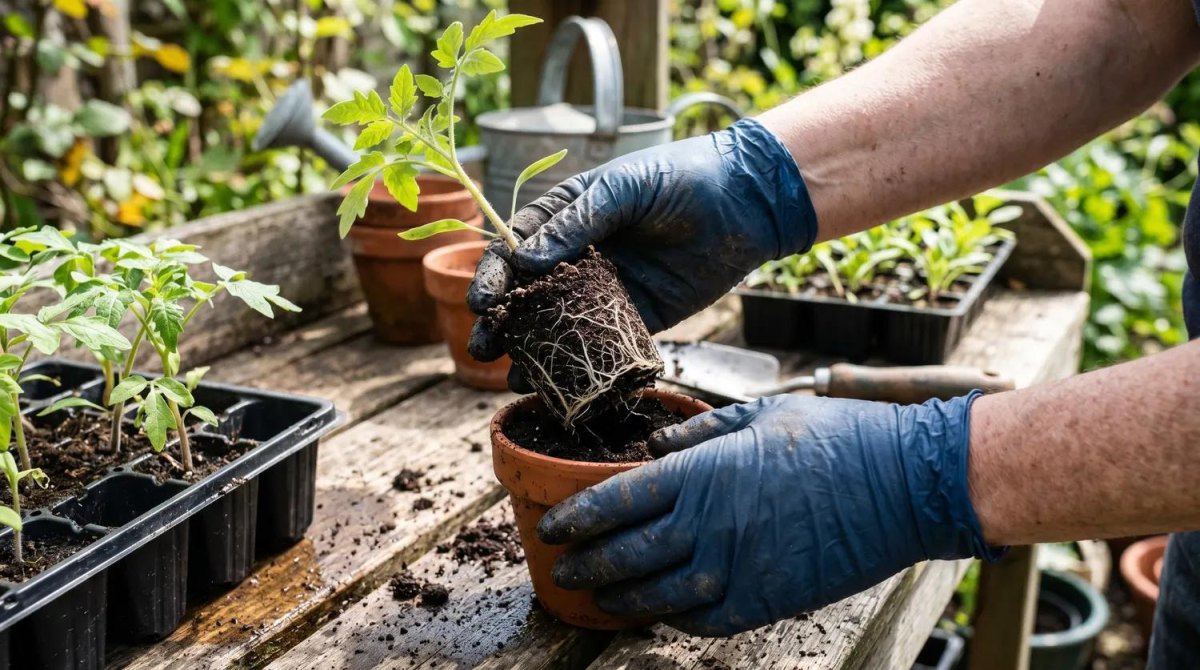
Seedlings don't stay tiny for long. Once they develop their first true leaves and begin filling their original cells, they may need more space to grow. This process is called potting up, and it gives young plants room to develop stronger root systems before moving outdoors.
I keep a selection of larger individual nursery pots ready for this stage. Small 2- to 3-inch pots are useful for many young transplants, although the appropriate size depends on the crop, its growth rate, and how long it needs to remain indoors. Choose clean containers with drainage holes rather than moving every seedling into an unnecessarily large pot.
University of Maryland Extension recommends potting up seedlings shortly after their first true leaves appear, while Utah State University Extension also identifies overlapping leaves and dense roots as signs that seedlings need more room.
- Prepare. Fill the larger containers with pre-moistened potting mix.
- Lift. Carefully loosen the seedling from its original cell.
- Handle. Hold the plant by its leaves rather than squeezing its delicate stem.
- Plant. Set it into the new container at the appropriate planting depth.
- Water. Water gently and return it to a suitable light source.
For my Boise zone 7a garden, potting up is only one part of the timing process. Our late spring frosts mean I still have to wait for suitable outdoor conditions before planting tender crops. I count back from my own last frost date for indoor sowing and allow time for hardening off before transplanting outside. Your local frost dates and extension service should guide your schedule.
My practical recommendation
Start with a few reusable trays, a good seed-starting mix, suitable lighting, and basic watering supplies. Add heat mats, domes, meters, and extra pots according to the crops you actually grow. My basement setup isn't fancy, but it gives me the control I need to raise healthy seedlings without spending money on equipment that sits unused for most of the year.
More Pinterest Visuals



 Seasonal & Flower Containers6 Fast Growing Flowers for Containers That Bring Quick, Colorful Blooms
 Balcony & Patio Gardens16 Small Garden Ideas for Renters That Save Space and Look Beautiful
 Herb Gardening9 Beautiful Herb Garden Design Ideas That Are Practical and Easy to Grow
 Raised Bed Gardening10 Best Vegetables for Raised Garden Beds That Are Worth Growing